Snapshot fuzzing an email client
Introduction
Keeping to the theme of 2023, another post on fuzzing!
In this post I’ll walkthrough how to fuzz a popular email client in China, Coremail, using open source snapshot fuzzer wtf.
I’ll target Coremail version 3.0.7, which is about a year old at the time of writing because I have previously reversed it.
Reversing will not be covered in this post due to NDA, and its just lots of manual work with windbg ida and procmon.
The focus should not be on Coremail, but rather fuzzing in general.
1 | do |
We’ll be fuzzing the above snippet, which is a loop to read in an exported .eml file(essentially HTML) and processing it.
For example, it is responsible for URL decoding %09 to a tab. Such functions that perform heavy parsing are generally interesting targets for fuzzing.
However, we would face some issues if we approached it with regular fuzzing.
Why Snapshot Fuzzing?
First of all, the target code resides in the target executable, not a DLL.
Without source code, we can’t easily harness the program because LoadLibrary is unable to load another exe into the process space. We’ll have to write our own loader for that. Furthermore, our target code is just a snippet of the entire function, which we don’t want to fuzz for performance issues.
With snapshot fuzzing however, we can just snapshot the executable while it’s being ran normally and replace the eml file’s contents with our testcase in memory, then revert anytime we are satisfied.
Another reason is because the code snippet we want to fuzz is an object method. As we know with classes, global states get extremely complicated, and we’ll have to perform extensive reversing to call each involved class’s constructor and destructor every iteration, or risk the curse of 50% stability zzz
Snapshot fuzzing of course doesn’t face such issues.
Regarding the designs of a snapshot fuzzer, I’ll blog about it some other day.
Fuzzing Flow
We’ll take a snapshot right after the ReadFile call and feed it to the fuzzer.
The fuzzer will work like this:
- Replace the file content and size in memory.
- Freely execute and log coverage until second ReadFile.
- Hit our breakpoint and revert, begin next iteration.
Cool. But we’ll have to take one limitation into consideration.
The open source fuzzer we’ll be using does not support device emulation. That means any access to disk, registry, network and such is going to fail terribly. Goodness gracious, even a print to screen is not going to coorperate.
We’ll therefore have to either use a ramdisk or write a filesystem/registry hook (https://github.com/Y3A/hook_fs) to satisfy the calls from memory, both of which have performance costs.
Luckily for us, our parser does not touch disk for any other reads, but it does log some data to a temporary file. Since the data is never read in the fuzz cycle, we can just hook the WriteFile call to return success without actually writing anything.
This is definitely something to consider when weighing which target function to pick. Always always use a tool like procmon to confirm what your target function is doing. Ideally we want to fuzz a pure modular parser function, but that depends highly on the quality of the code we are auditing. In a few years however I’ll expect lightweight, precise emulation fuzzers to exist for public use.
Initial Setup
To fuzz with wtf, we need a Hyper-V VM, which in turn means Windows Pro.(Actually not really, but the workflow is designed for Hyper-V)
According to the README, we’ll create a new Windows 11 VM with 4096mb of RAM and one virtual CPU. This is because wtf only creates one bochscpu backend(assuming we’re using bochs), and it makes everything easier.
We also need to turn off dynamic ram, turn off checkpoints and turn off secure boot.

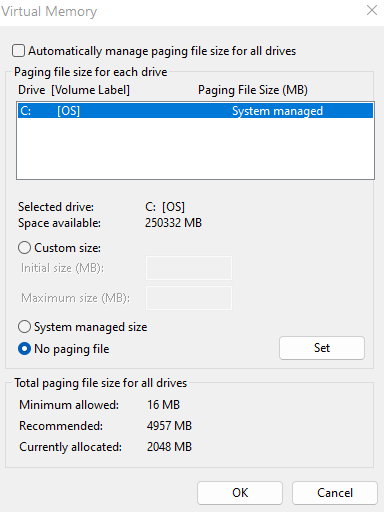
After booting up, disable paging in the guest:
View Advanced System Settings->Advanced->Performance->Advanced->Virtual Memory->No Paging File
Since wtf does not support device emulation, we obviously can’t page in from disk.

An alternative is to use the author’s tool:
https://github.com/0vercl0k/lockmem
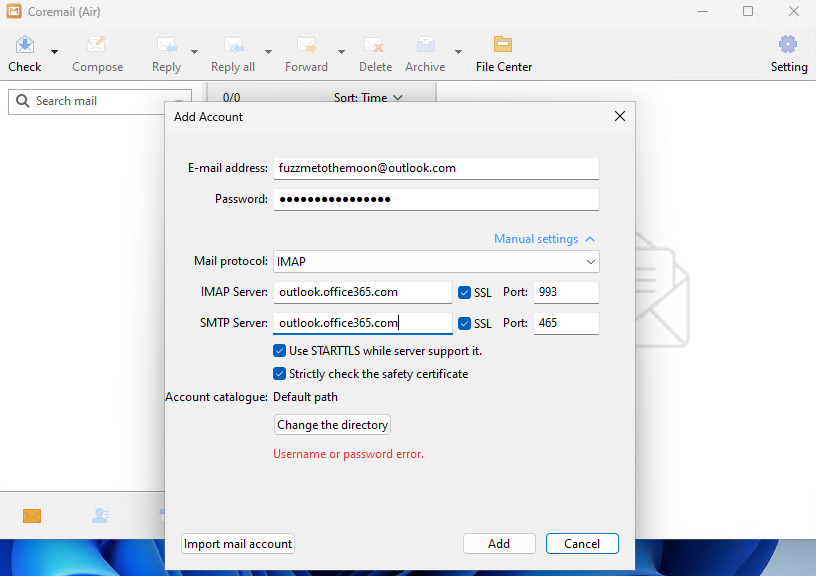
Now we can register an account and setup Coremail.

For the initial corpus, I just modified it off the welcome email from outlook, since it’s pretty complicated already.

wlc.eml:
1 | From: Outlook Team <no-reply@microsoft.com> |
Remember to keep the filesize relatively small(around 1kb is ideal). Otherwise the fuzzer might be wasting time on mutating useless data.
Create a new target directory under wtf-main/targets and save this file in the inputs folder.
The target directory should contain these folders:

Now we’re ready to attach a kernel debugger to take a snapshot.
Taking the snapshot
On the guest system, open up an admin command prompt and run:
1 | bcdedit /debug on |
Replace with your host's IP.
Now on your host, run WinDbg
1 | "C:\Program Files (x86)\Windows Kits\10\Debuggers\x64\windbg.exe" /k net:port=50000,key=a.b.c.d -c |
This allows us to perform network kernel debugging.
Note: Your target has to be at least Windows 8. Use serial debugging for anything lower.
After a reboot of the guest, WinDbg should be attached.
Before we snapshot, we need to make sure all bytes of any DLL the program loads is paged in and loaded. If the program uses lazy loading, some DLLs might not be fully mapped in the process space, and will lead to pagefaults when fuzzing with wtf.
We’ll use the command line debugger in the guest to do so:
1 | "C:\Program Files (x86)\Windows Kits\10\Debuggers\x64\cdb.exe" -pn cmclient.exe |
One way to do it is just to touch all bytes of the DLL address space.
You can do it manually:
1 | 0:036> lm o |
or using a script:
1 | from pykd import dbgCommand |
1 | 0:037> .load "C:\\Users\\User\\Desktop\\pykd.dll" |
In the process above, remember to save the base address where our target function lives in. In my case, that’s the base address of CMClient.
Now we can exit the command line debugger:
1 | 0:036> qd |
To set a usermode breakpoint in kernel debugger, we have to switch to the target process invasively.
WinDbg commands will not be covered here as it’s assumed to be a pre-requisite!
1 | kd> !process 0 0 cmclient.exe |
My target code resides at an offset of 0x5fb196 into CMClient.exe(after ReadFile), but I’ll break at 0x5fb190 to capture the arguments to ReadFile.
After we load the eml file into Coremail, kd will break and we can extract the arguments.
1 | kd> g |
In particular, we are interested in argument 2 and 4, which is the buffer to store the read, and the pointer to the number of bytes read.
1 | kd> r rdx |
After saving these addresses somewhere, step over the call and take a dump :p
1 | kd> bc * |
Here I used https://github.com/yrp604/bdump , which is recommended in the README of wtf.
Writing a fuzzer module
wtf allows us to fuzz arbitrary targets by extending its source code. For every new target we have to write a new fuzzer module that tells the fuzzer how to behave.
They are generally straightforward to write, and we can modify the given examples (https://github.com/0vercl0k/wtf/blob/main/src/wtf/fuzzer_hevd.cc and https://github.com/0vercl0k/wtf/blob/main/src/wtf/fuzzer_tlv_server.cc).
Below is the fuzzer module for cmclient:
1 |
|
We instruct the fuzzer to only accept testcases of maximum length 8000, and write the testcase and size to the addresses we captured previously using WinDbg.
We also tell the fuzzer to revert after hitting the breakpoint(second ReadFile), and fake calls to WriteFile.
At this point, we can compile wtf and begin fuzzing.
Fuzz away!
server.bat:
1 | "C:\Users\chenl\Desktop\hacking\tools\wtf-main\src\build\wtf.exe" master --max_len=8000 --runs=100000000000000 --name cmclient --target . |
client_run.bat:
1 | "C:\Users\chenl\Desktop\hacking\tools\wtf-main\src\build\wtf.exe" run --name cmclient --state state --backend=bochscpu --limit 10000000 --input inputs\wlc.eml --trace-type=rip |
client_fuzz.bat:
1 | "C:\Users\chenl\Desktop\hacking\tools\wtf-main\src\build\wtf.exe" fuzz --name cmclient --backend=bochscpu --limit 10000000 |
wtf supports parallel fuzzing by starting a server, which accepts TCP connections from one or more clients. The clients will perform the actual fuzzing, and send the results to the server for synchronisation.
We first spin up a server by running server.bat, then run client_run.bat to perform a dry run.
Along with symbolizer(https://github.com/0vercl0k/symbolizer), we can verify PC traces of the run to make sure it didn’t crash somewhere unintended. This works much better if we had actual pdb symbols.
1 | Initializing the debugger instance.. (this takes a bit of time) |
1 | <...> |
The traces look good, and we hit the breakpoint as expected.
Now we can run the actual client_fuzz.bat.

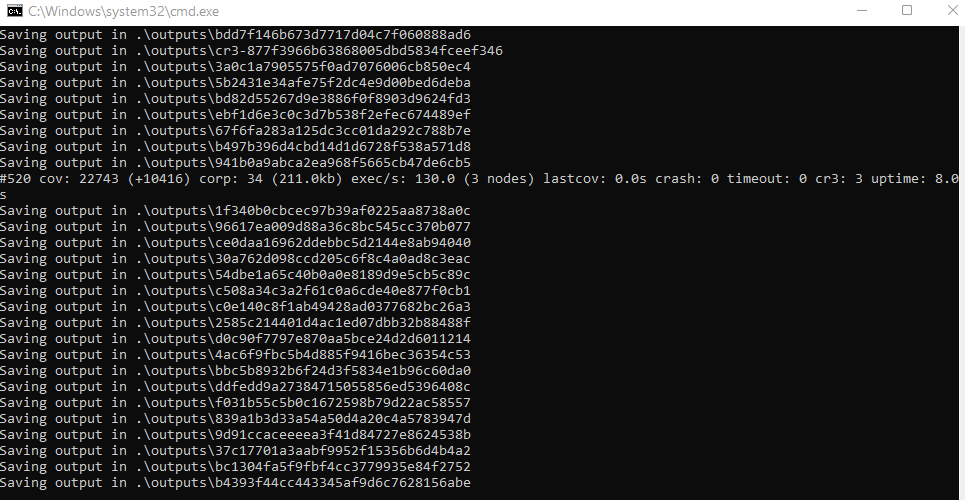
Immediately after running, the fuzzer finds new testcases to store, which is usually a great sign.
Now we can scale it up and wait for time to work its magic.
I’m planning to run 13 nodes for a week, which takes up about 65% of CPU so I can still play fifa :p
Conclusion
Snapshot fuzzing is a really creative invention, and it’s a great improvement to oldschool fuzzing in terms of stability and ease of use. Apart from wtf, other public snapshot fuzzers include nyx-fuzz, which is more heavyweight and requires a dedicated VM to run. However, it does support full system emulation like some of the private toolings used in big companies, which is super neat.
In this article I used wtf with bochscpu as an emulator, which is the slowest(but most accurate) of all 3. Running 13 nodes gives me around 390 execs per second. An exercise for the reader will be to run their fuzzer on a KVM backend, which is said to give 100x speed improvements for the same specs. That’s insane! But to achieve that you’ll probably have to rent a baremetal server for a couple of weeks, which can be costly.
Finally, it’s important to note that fuzzing is an iterative process. This is just the beginning, and we have to go through more rounds of checking coverage, editing the module, getting new corpuses or even finding new target functions in order to comprehensively assess the target.
I’ll update above if a bug does occur after a week of fuzzing.
..
